
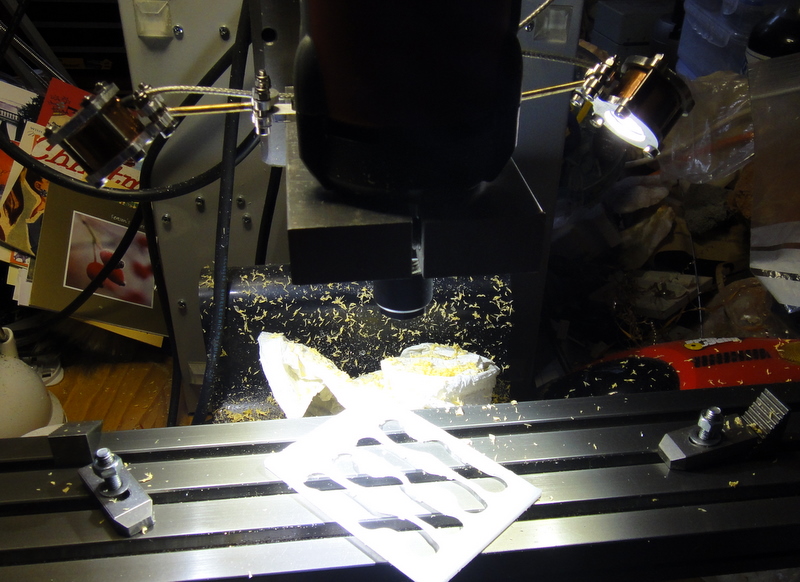
(1/11)
My Taig needed some illumination. These are single-LED lights on ball-and-socket swivels, fixed to the motor mount so they always point at the tip of the tool. The LEDs are 3W, 90 lumens each, which seems to be plenty.

Parts list:
From Rapid:
55-1980 MICRODRIVER 9 LED DRIVER (which provides a 700mA constant-current supply from 240V AC)
55-1988 4V 3W White Star LED 90lm (LED on an aluminium base)
55-2026 OPTIC HOLDER 3W EMITTER/STAR CLR (lens holder)
55-1970 OPTIC 25DEG WIDE 20MM (lens for the LED)
And
8mm stainless ball bearings from GMS Ball Co Ltd
3mm brazing rod
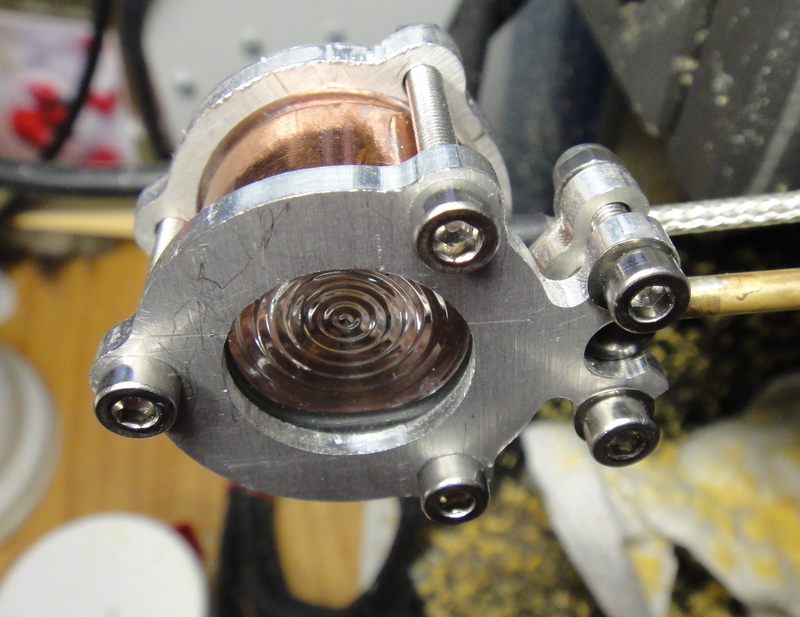
22mm copper end-caps from B&Q's plumbing department, which are exactly the right size for the LEDs
O-rings to fit inside the end-caps - I actually cut down larger O-rings to fit, and superglued the ends back together.
Fasteners from PTS:
M3 x 25 and 16 cap screws
M3 nyloc nuts
M3 crinkle washers (yes, you really need crinkles)
And a bit of 3mm aluminium sheet to machine the rest of the parts from.I used a bit of an ancient disk-drive case.
Here are CamBam files for the parts: machinelight_cambam.zip. That include the file to make a ball-to-ball clamp part, which I machined but did not use. I realised I really didn't need two-part arms.
Assembly:
Machine and saw out the aluminium parts.
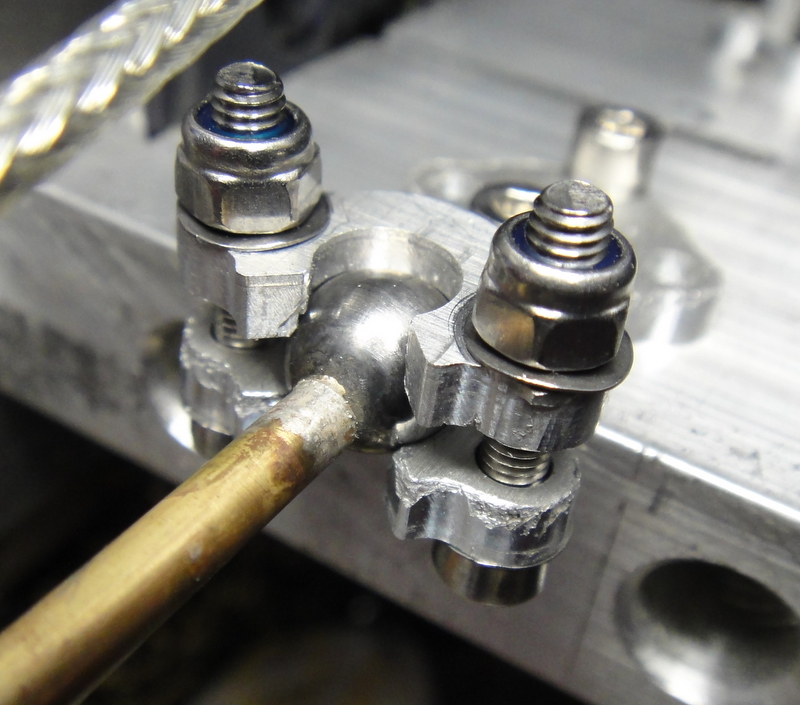
Silver-solder balls to a bit of brazing rod.
Drill a cable hole in the side of an endcap, and clean up its rim. I put mine in the lathe.
Solder wire to an LED, and fit it into an endcap. A bit of heatsink compund wouldn't go amiss if you had it.
Put the lens into the lens holder, and drop it on top of the LED. You may need to clip one of the wings off the lens holder so it doesn't foul the wire.
Put the O-ring on top of the lens.
Clamp the whole assembly between two endplates, and put three bolts in to hold it all together.
Now assemble the ball-clamps around the bearings. I found that this only worked right when I put crinkle washers in, under the bolt head and under the nut. Without the spring of the crinkle washers, you can't get a predictably stiff ball-joint. Regular split spring washers were not effective.
Attach the baseplate to the machine, and you are done. I tapped a couple of holes in my motor mount to attach it. I also machined a couple of little tapped plates which will slide into the slots on a standard Taig spindle, if I ever go back to that.
I found (by experiment) that if you disconnect the LED from the supply and reconnect it while the power is on, the supply will destroy the LED. The LED will fail short, and that will destroy the supply. Do not do this.
Here's the parts layout:

And one assembled light:
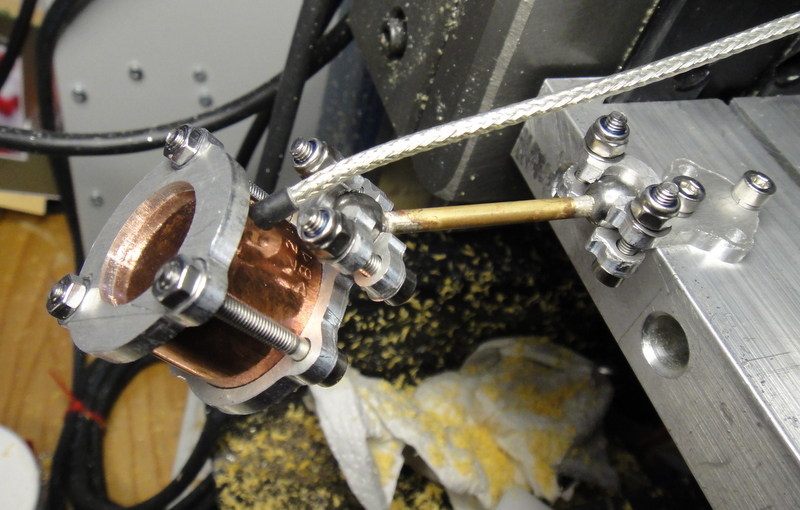
Note the crinkle washers.
 Home | Artefacts| CNC