(4/10)
My MF70 CNC mill has done a lot of work, but I'm feeling its limits in terms of accuracy, working envelope, and stiffness. So it's time for a new one.
I've converted a Taig Micro Mill to CNC. And so has Anton. Doing two at once meant we each have to think half as hard.
We found some great Taig resources on the Web. Carter Tools has a lot of good stuff, in particular the Setup Guide (which, frankly, Taig ought to supply with the mill - all we got by way of docs from Taig was a scratchy exploded diagram)
See http://www.jeffree.co.uk/pages/taigcncpt1.htm for an eloquent discussion of the flaws of the Taig shaft couplers and of an alternative approach using better couplers. Worth reading even if you don't go with his approach, just to understand the Taig ones better as you fit them.
And Tony Jeffree's conversion notes for discussion of which steppers you might want and why, plus a parts list for his control box. We cribbed mercilessly from that.
Here's Steve Blackmore's nicely-documented conversion too
The shopping list:
Taig 2019CR-ER (that's the model with the ER16 spindle, long table, adjustable leadscrew nuts, and a faster motor), supplied by the very helpful Peatol (which is to say, Peter Morrison)
Taig's NEMA23 stepper mounts (also via Peatol)
FL57STH56-3008B steppers (1.8 degree, 4.4mH/phase 4.2A/phase when wired in parallel, 1.24Nm). Less torque than Taig suggest, but more speed, following Tony Jeffree's arguments.
4.2A stepper drivers from Arc Euro Trade
ncPod USB stepper controller
And a dumb linear PSU, following Tony Jeffree's example.
Control box parts list:
231-992 Steel box
Taig's supplied transformer is a bit scary. It had no earth continuity from input to output. I have modified it to fix that (though I have not fixed the rest of its regrettable build quality). If you buy a Taig in Europe, I suggest you carefully test the transformer they supply before you use it. I also found that the supplied fuse in the transformer blew the first time I used it. I replaced it with a 3A slow-blow from RS, which seems to be a lot better.
After a bit of use, it became clear that one of the problems I was having with finish was caused by motor vibration. A 60Hz 110V motor doesn't have enough iron in it to run happily at the 50Hz 110V that comes out of Taig's transformer, so it will be saturating. That causes vibration & extra heat. My suspicions were confirmed byt the kind folks at CNCzone.com. A quick experiment with a variac revealed that the vibration decreased quickly with decreasing voltage, and was basically gone at 90V. I am now running on an autotransformer that gives me 95V, and there's a lot less vibration. The motor stays cooler, too.
If you're in the UK and shopping for a Taig, I suggest you either find a 240V motor to fit to it, or at least throw away Taig's transformer and get a 90V one instead. It does seem unfortunate that Taig have not sorted this problem out themselves. Or, proceed directly to a Kress motor, if you want high speed and low torque. See below.
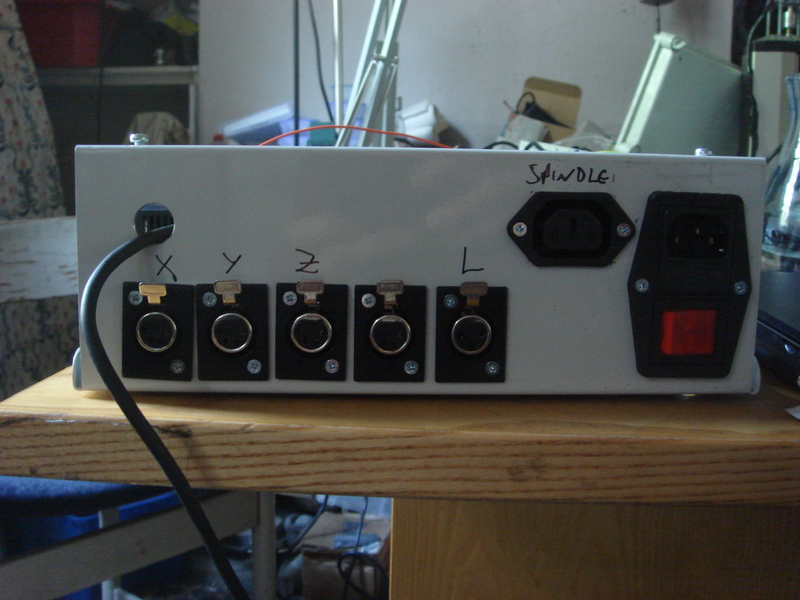
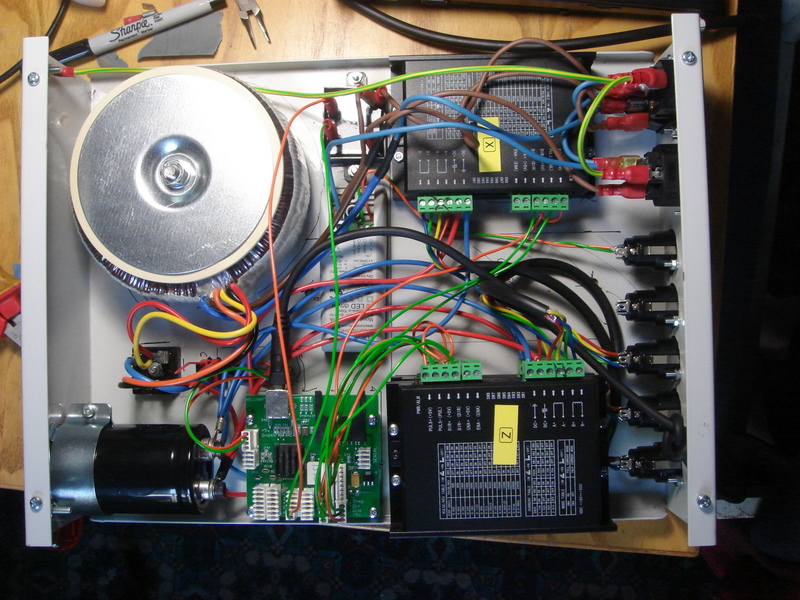
Here are pictures of the control box and transformer. Note the external earth tags on the transformer.
More speed, Igor!
After a bit of use, I decided I needed more spindle speed for small-scale jewellery work. A lot more speed.
I contemplated playing with pulleys to get the Taig spindle going faster. The bearings are apparently rated for 18k RPM.
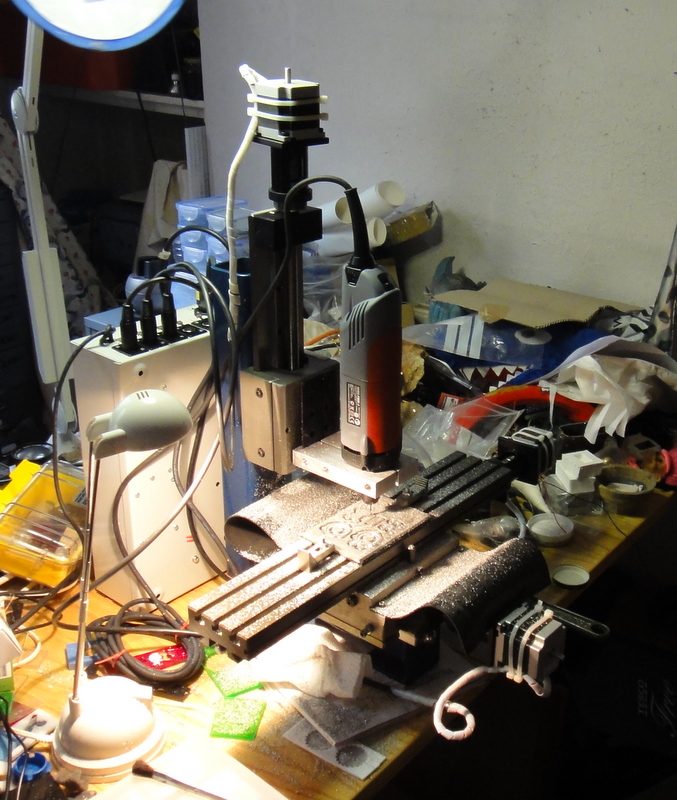
But in the end, I went with a 5-25k RPM Kress FME 1050 spindle motor, which you can see in the picture above, on a Taig 43mm motor mount from Model Engineer's Digital Workshop.
The other mount I found was this one from Brianna Products , which looks a bit nicer, but I was in a hurry and didn't want to wait for the transatlantic order.The real downside of the Kress, for a kitchen-table machine, is that it is a lot noisier than the Taig motor and spindle. Not intolerable, but less consistent with conversation.
Mach3 setup:
The drivers are set to 3200 steps/rev, auto-half-power on, 4.2A. Leadscrews are all 20TPI, giving 64k steps/inch or 2519.685 steps/mm
The setup in Mach3 is:
Config/Select native Units - MM. I tried doing it in inches, but (annoyingly) that switched the UI to display in inches and (alarmingly) switched the gcode units to inches! Fortunately I stopped it before it made a 25x scale model of my testpiece.
Config/Motor tuning:
These are my initial rough values that seem to work, but they could bear a bit more tweaking.
X,Y - 2519.685 steps/mm, velocity 1500 mm/min, acceleration 750 mm/s/s (0.07g) step pulse 0, dir pulse 0
Z - 2519.685 steps/mm, velocity 750 mm/min, acceleration 500 mm/s/s (0.05g) step pulse 0, dir pulse 0
(Those were too high after tweaking the leadscrew nuts for backlash, so I went down to velocity 500/500/500 and acceleration 500/500/500)
(25/7/2010 - I've been having a missing-step problem, once in every couple of hours of machining - I have halved the acceleration limits to 250/250/125 in a bid to fix that)
Port setup - Port 1, 0x378, kernel speed 25000
Motor outputs:
X step 2 dir 6
Y step 3 dir 7
Z step 4 dir 8
I used Config / Homing/Limits to reverse the Y and Z axes - the Mach3 help suggests doing the reversing by changing the Config/Ports and Pins/Motor Outputs/Dir LowActive value, but that doesn't work when you have an ncPod.
 Home | Artefacts| CNC